This guide will walk you through the steps required to change your domain names DNS records and point or connect your domain to Canva service.
Note that connecting your website or DNS to an external provider means that we do not provide any support, and any issues relating to these changes will need to be provided by the third party.
As such, we ask that you make these changes carefully and understand the risk associated with this.
Log in to the client service area and click on Services
- On the Services page, click Active button for the WordPress NVMe/Email only hosting package that you want to make changes for
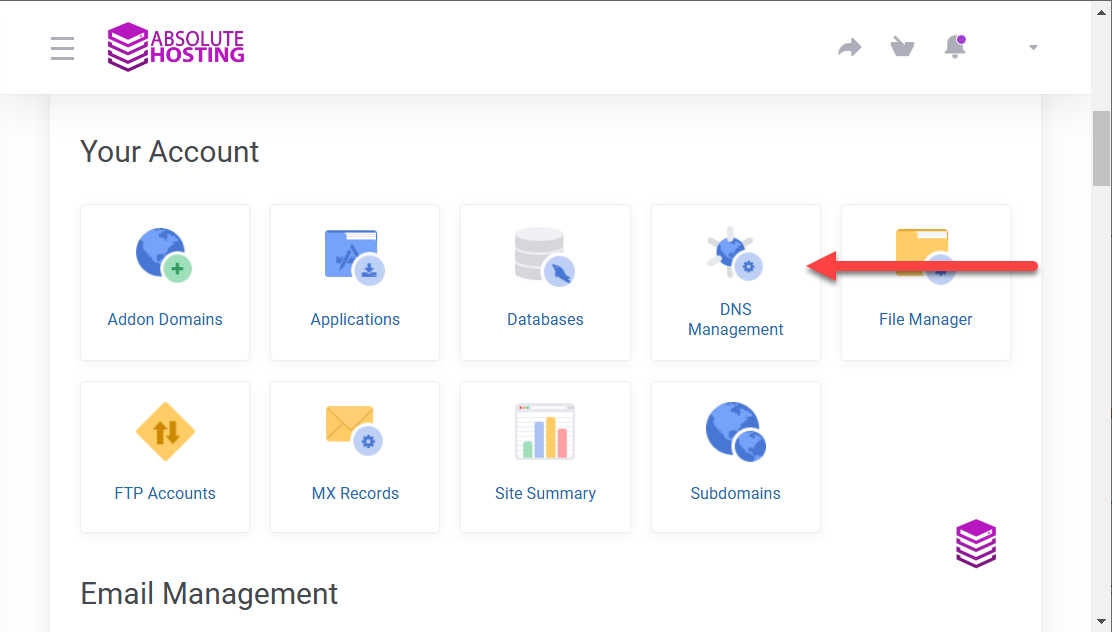
- On the Manage Product page scroll down to Your account and click on DNS Management
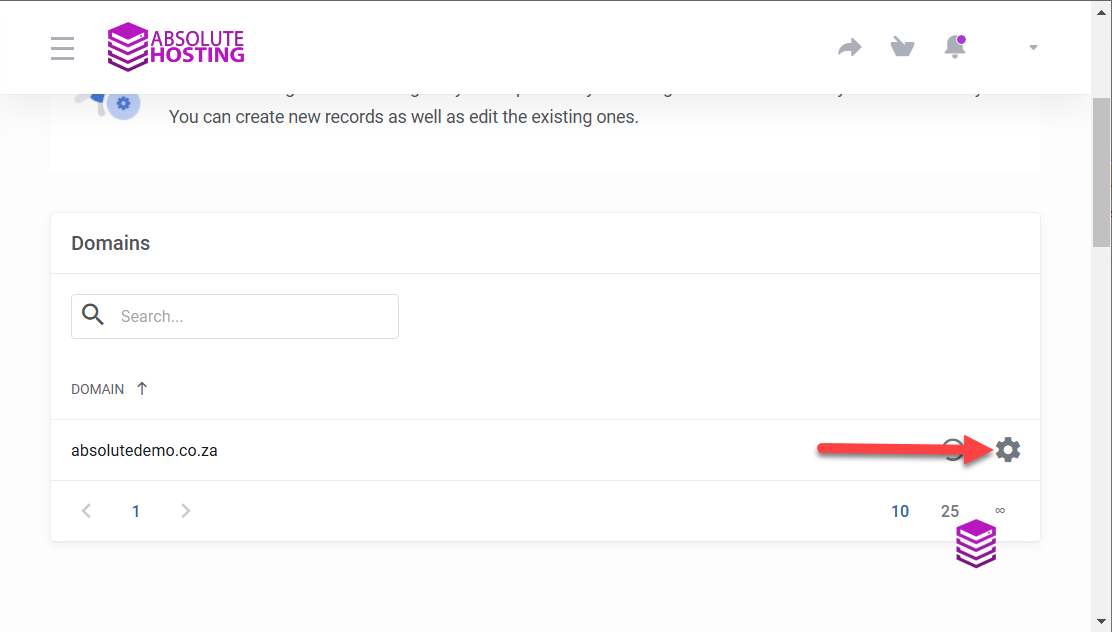
- On the DNS Management page click the Cog icon
- On the DNS Management page click the Pencil icon to edit the first record type that has your domain name followed by a . listed in the name column where the record type is an A record. When providers state the name of a record is @ they are referring to your domain name, in this example it would be absolutedemo.co.za.
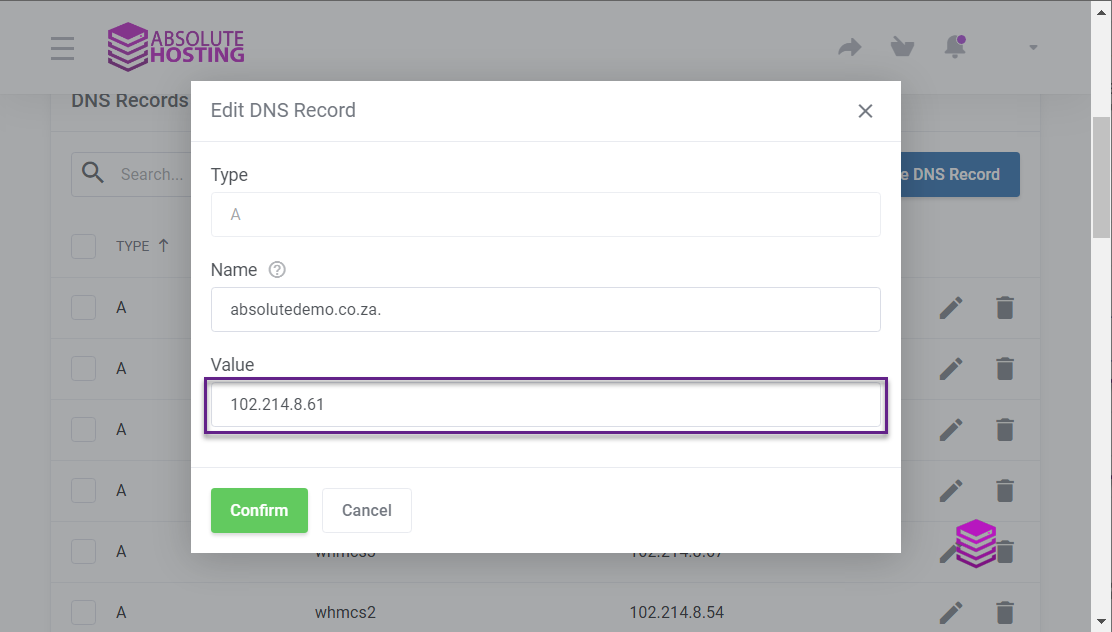

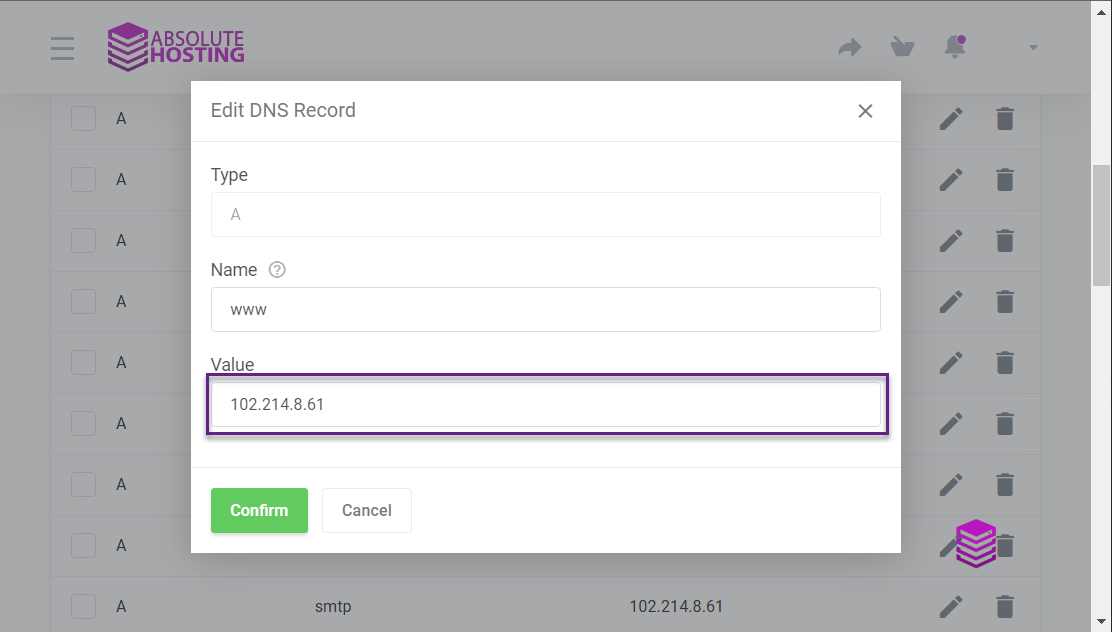
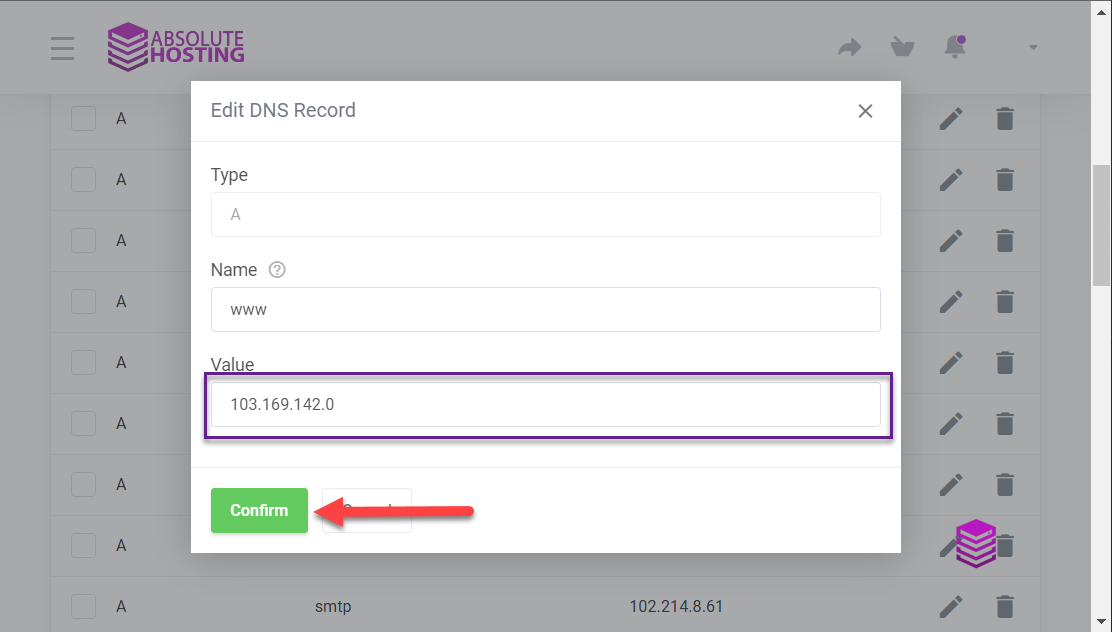
- On the Edit DNS Record pop up, change the value of your Absolute Hosting IP to the IP address provided by Canva (103.169.142.0) and click Confirm as per above. Please note that this IP was provided by Canva and may be different from the IP that Canva to you.
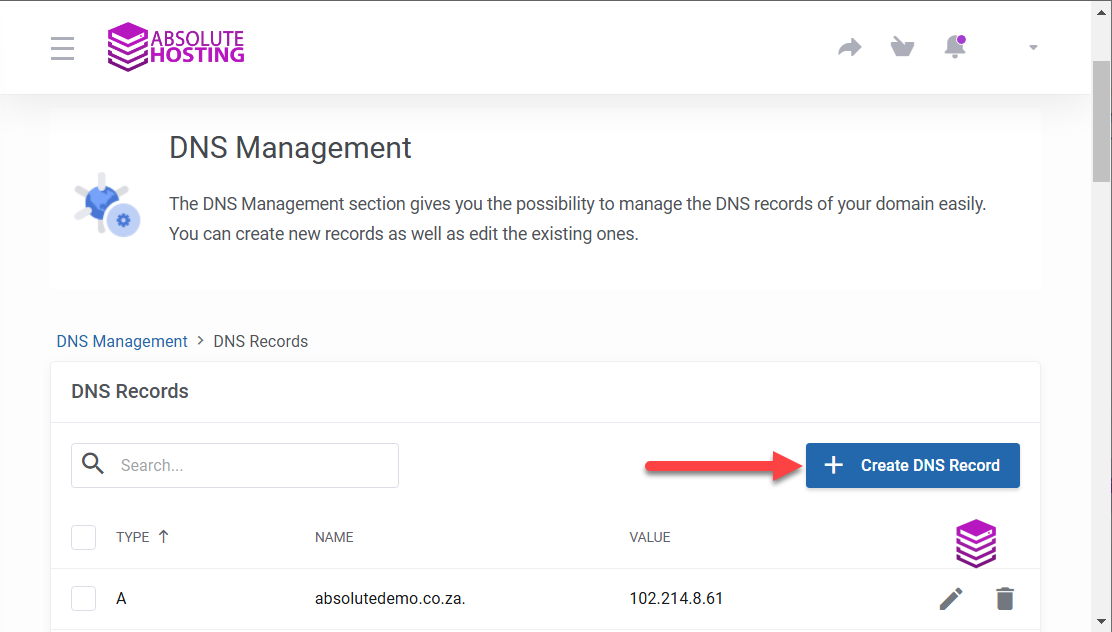
- Click the Create DNS Record Button to create a txt record that Canva may request that you add to your DNS
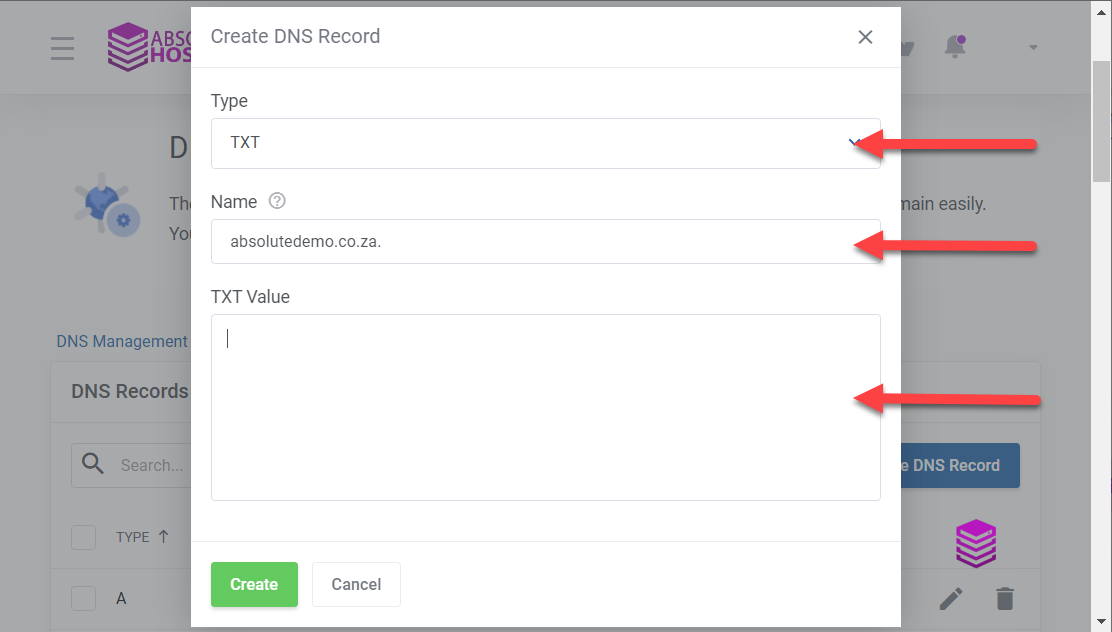
- On the Create DNS Record popup, change the Type to TXT, enter your domain name with a . at the end for the Name and enter TXT value that Canva provided and click Create
Wait 4 - 24 hours for your changes to reflect
The above guide is based on the following instructions provided by Canva's website at the time of creating this guide
